2. Using Machines
2.1. Machines homepage
If you have read the introduction carefully, you realize that the most important tab is the Machines one. If you click on it, you should land to the Machine Manager page:
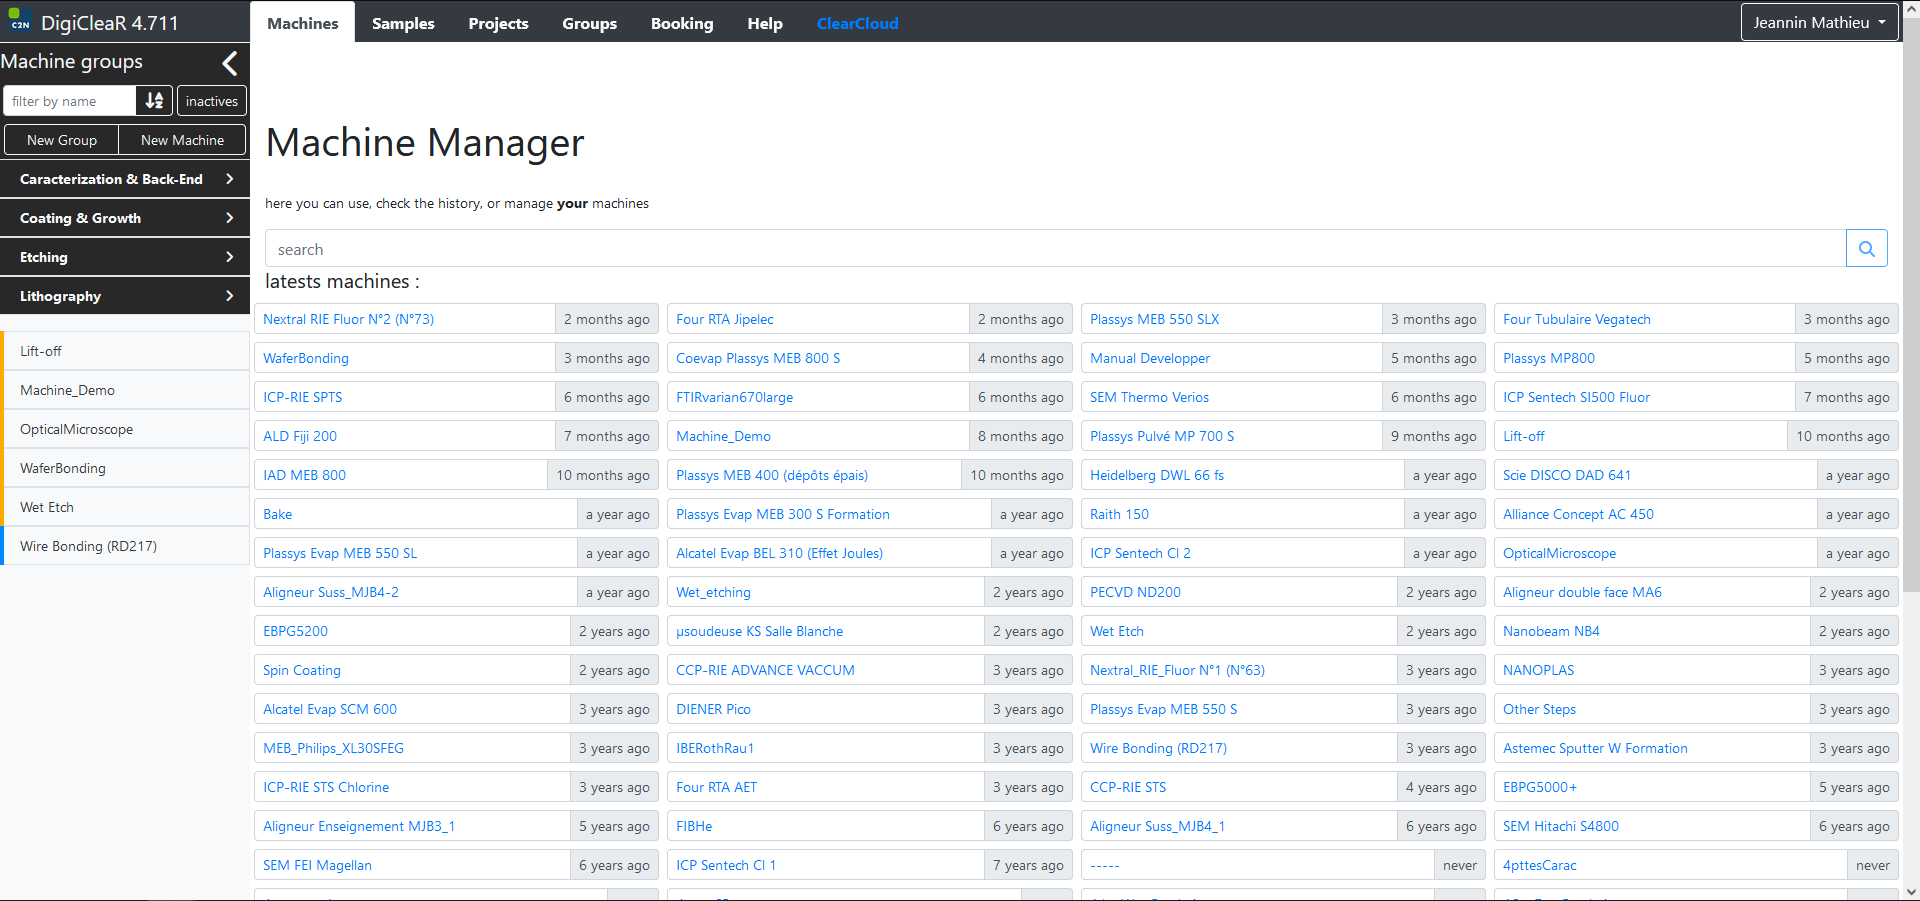
The central search bar allows you to look for a particular machine. Below are listed machines recently used in Digiclear.
On the left side, a menu bar appeared, with several menus. First, a search field, to quickly find a machine. The button next to it sorts in alphabetical ascending/descending order. The “inactive” button allows to display inactive (or archived) machines, we’ll come back to this later. Let us put aside the “New Group” and “New Machine” functionalities, they are covered in the Advanced Functionalities part of this documentation.
Below these, you will find a list of machines available on Digiclear.
Note
You might not see all the machines that are present in the cleanroom, for various reasons. Some machines are simply not declared by their manager on Digiclear. Some machines are “private”, and you need to be trained on them and added to the user list by their manager before they appear. But for most of them, they should be visible here.
Pay attention to the color of the small leftmost bar near the name of the machine: it shows your role on this machine.

On the close-up view above, you can see three different colored bars in front of the machine names.
A gray bar indicates that you are only observer on this machine. You cannot use it, or change its settings. But you can make a request so that a trained user will perform the step for you. For example:
A blue bar indicated that you are a user of this machine. You can perform a process step and log it in Digiclear. For example:
An orange bar indicates that you are the manager of this machine. You can perform a process step, and change the settings. For example:


At first, you should be declared as observer on almost all the existing machines. Upon training, you will be added to the user list of the machines that you use.
Now, let us assume that you have been trained on a machine. You can click on its name, and land on this machine page. We will use the reactive ion etching machine Nextral RIE Fluor N°1 (RIE63) as an example.
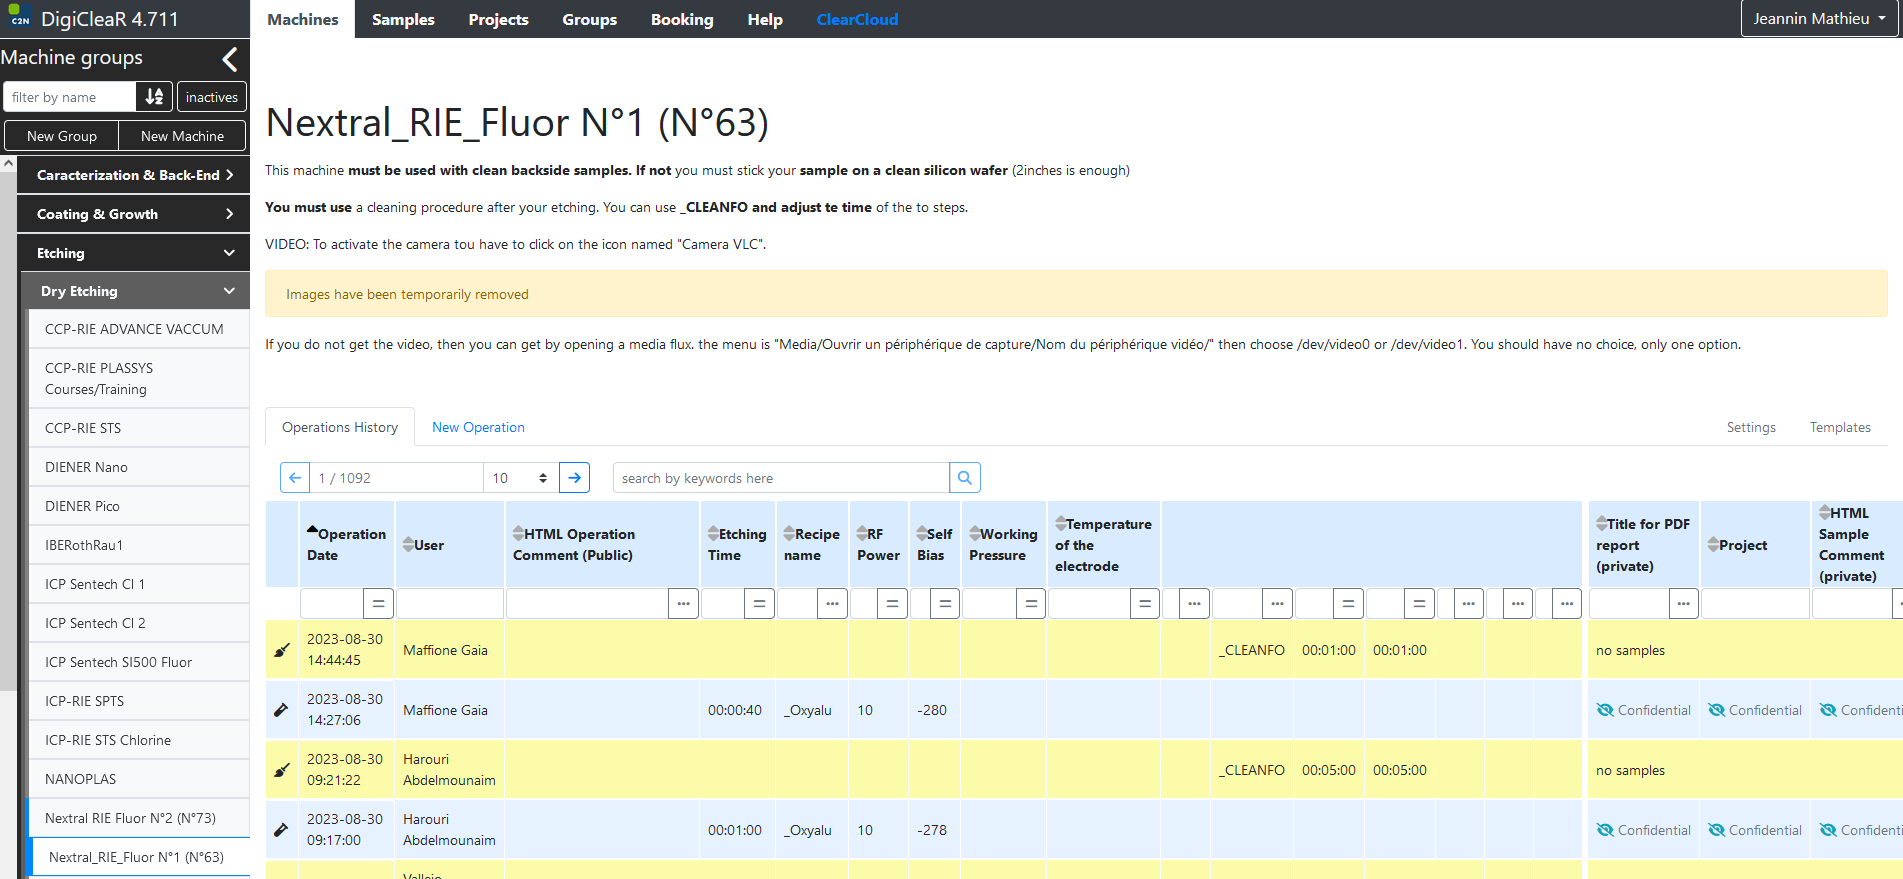
The first thing that you see is the machine name. Below, you will find a public description, and all information added by machine managers. Below the description, a series of tabs (left and right-aligned):
Operation history: logging all past process steps performed on the machine (most recent first).
New Operation / Request: to fill in a new operation, or request a process step
Settings: To access the settings of the machine
Templates: to change the layout of the process steps / requests
Now obviously, since we are only users of the machine, the last two tabs are grayed out.
2.2. Machine History
In this tab, you have access to the entire machine history, i.e. the process steps, in anti-chronological order. This history comes as a table, where columns header indicate the main process steps parameters. As a consequence, all machines history are different from one another. You can sort and filter the operation history by using the arrows and search fields for each header. As an example, let us filter through the last operations of Laurence Ferlazzo, the engineer in charge of this machine. To filter, type the searched item in the corresponding field. If a match exists, a green tick appears to show that the query is completed.
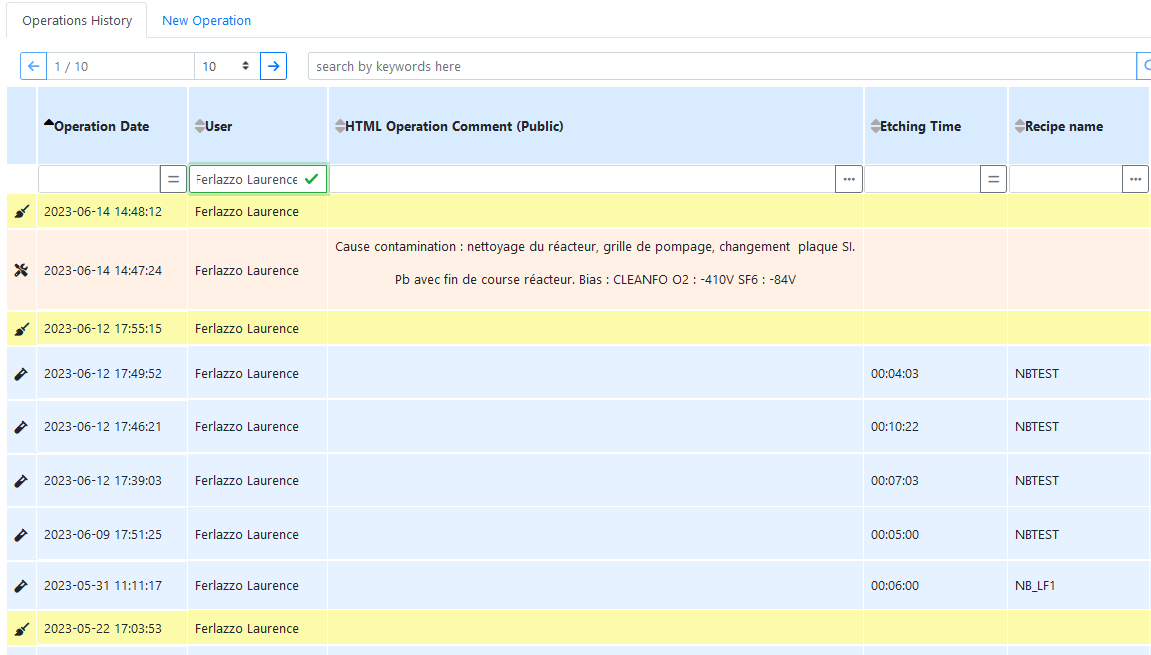
We can see several steps performed, with different colors. These colors can be customized for each machines, and usually represent different kinds of process steps. By default, the blue background on a step indicates a simple process step. Here, the yellow color on the first and third row indicate a cleaning step. The orange background indicates a machine maintenance. Clicking on a process step expands the informations:

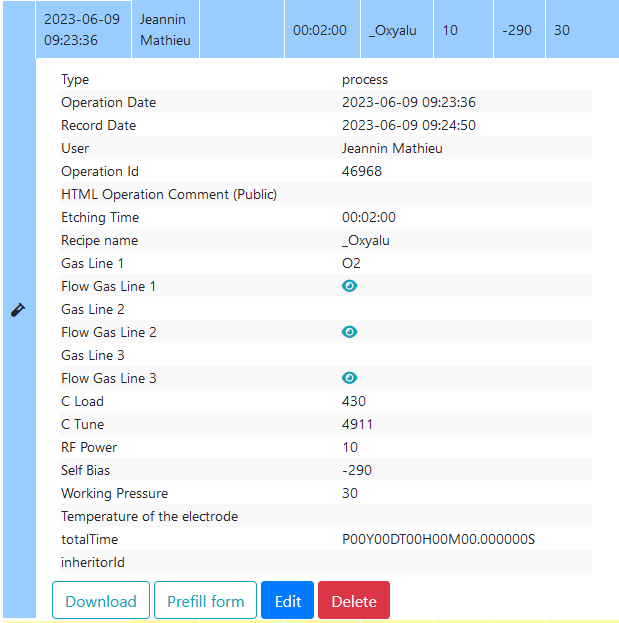
You can then see various fields divided in two columns. The left one concerns the process itself: type of operation (here a process step), date, who performed it, and some parameter details. The right one concerns the sample. You immediately see that some parameters are kept confidential: the sample name (top of the right column), the research project to which is belongs, or some recipe parameters like gas flows. This is because you, as a user, do not share ownership of the processed sample.
2.3. Entering a new process step
To record a new process step, click on the New Operation tab. You will find a form to fill, divided in two parts. The first part concerns the process step only, while the second part concern the sample(s) that are being processed. Below is an example of an empty process step, for the same Nextral RIE Fluor N°1 (RIE63) machine as above. Remember that all machines take different parameters as input, so the form and options will be different for each machine.
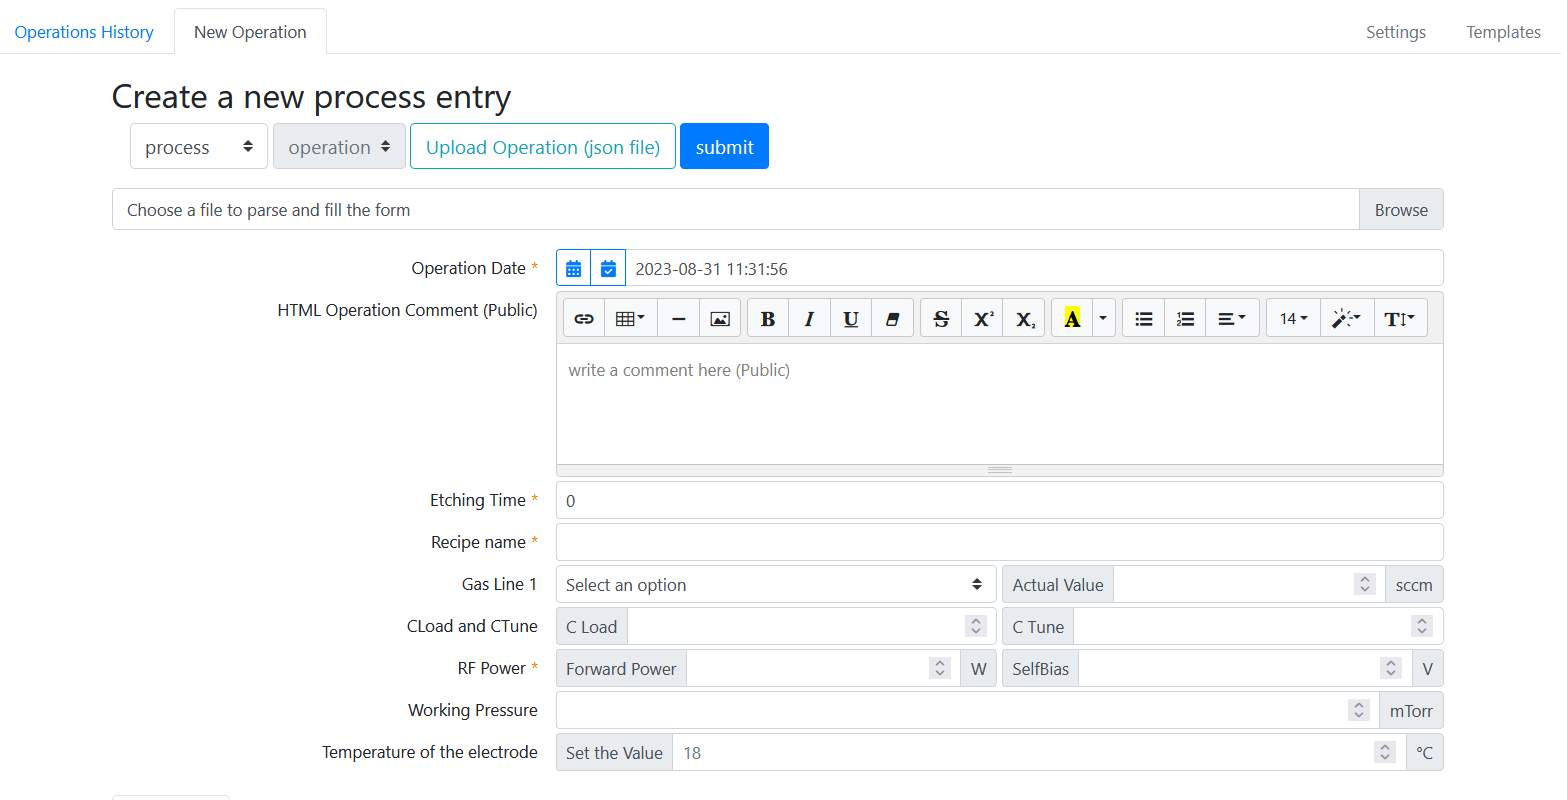
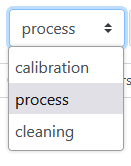
Below the Create a new process entry title, several options are available. The first button shows available options for the operation you log in, such as a process step, a cleaning operation, a maintenance or a calibration:
The second button allows to toggle between an operation and a request. It is often grayed out, as you can make either one or the other depending on your role. Let us discard the Upload button for now. The last button is Submit which allows to register the operation in the database.
Common to all machines, the Operation date field allows you to register the date and time of the process. It is automatically set to the date/time when you pressed the New Operation tab. However, in the case where you fill several process steps at the end of a work day, this allows you to set back date/time accordingly. To do so, you can use the small calendar icon 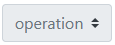 . Alternatively, the ticked calendar icon
  allows to revert to the date/time at which you started entering the operation.
You will then find a series of fields to fill. The ones that are marked with a red asterisk are mandatory, and you will not be allowed to submit the operation if they are not filled.
Below, you find the Sample part of the operation.
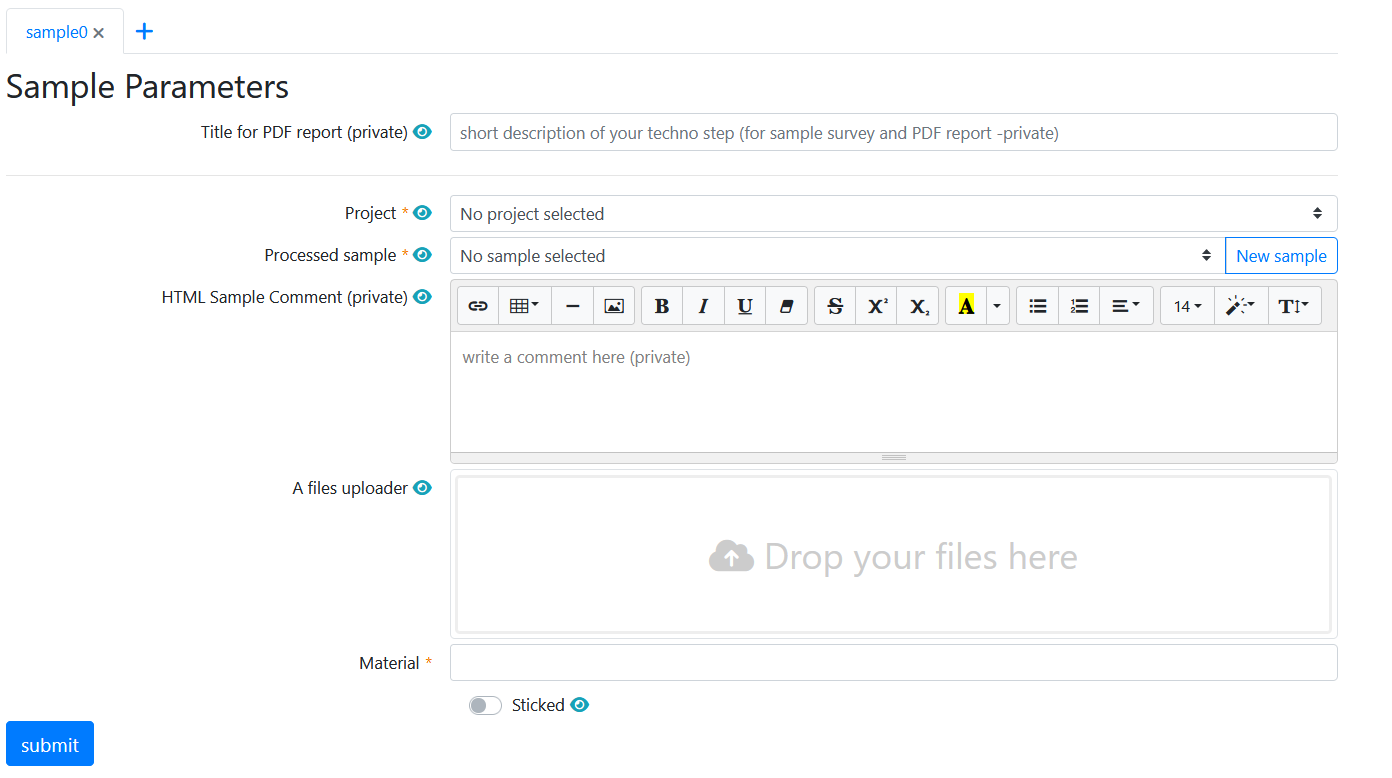
For each sample, you will be required to indicate at least the research projects to which the process step is attached (a sample can contribute to several projects), and the name of the sample. All fields marked with a blue eye icon  are confidential, and will only be shown to other users sharing the same sample.
Depending on the machine and settings, you can add several samples to the same operation, by clicking on the small blue + sign  . If this process step is performed on a new sample, and you have not created it yet, you can quickly create it using the New sample button
  . Refer to the Samples page for more information.
Warning
Do not forget to click submit ! Otherwise, all this work is for nothing, and nothing is saved.
2.3.1. Bonus: Prefill form
You can enter a new operation based on a previously registered step. This is helpful e.g. if you repeatedly perform the same process step, and no parameter change. To do so, search for the operation step to be used as a template in the machine history, for example an oxygen plasma step as below:
and click on the Prefill form  button. This will open the New Operation tab with all parameters set us like the selected step. Do not forget to update the date/time by clicking on the icon (by default this field is blank when using the prefill button), and of course to enter the correct sample information.
2.4. Editing / Deleting an operation
Sometimes, it is necessary to edit an operation already registered in Digiclear. For example, some machines require to log in their initial state upon arrival (like SEMs, where it is necessary to keep track of the gun vacuum level or emission current), and later on some observation parameters. You could leave the New Operation tab open all the time, but at the risk of being logged out after a long inactive time, or even loosing the information is closing the page. This feature also simply allows correcting for mistakes you made while filling the form initially.
Note
Since this operation affects the Machine, it is not possible to edit a process step from the Sample history. You have to do it from the Machine history.
Browse the machine history or use the filter to locate the operation
and use the Edit icon  .
.
If instead you want to delete this operation, use the Delete button  . Note that this does not delete the operation from the Digiclear database: to ensure data integrity, the database keeps track of everything that is submitted. But the operation will not be displayed in the machine or sample history anymore.
2.5. Making a request
If you need a process step performed on a machine for which you have not been trained, you can ask for someone to perform the step for you. Typically, this is done by the team of cleanroom engineers in charge of the machine. After discussing with them, you can file a request on Digiclear. Let us take the example of a dielectric deposition on the PECVD ND200. We select the machine from the left menu bar, and then click on the New Request tab. This tab is very similar to the New Operation one, and is again divided in a process part and a sample part.
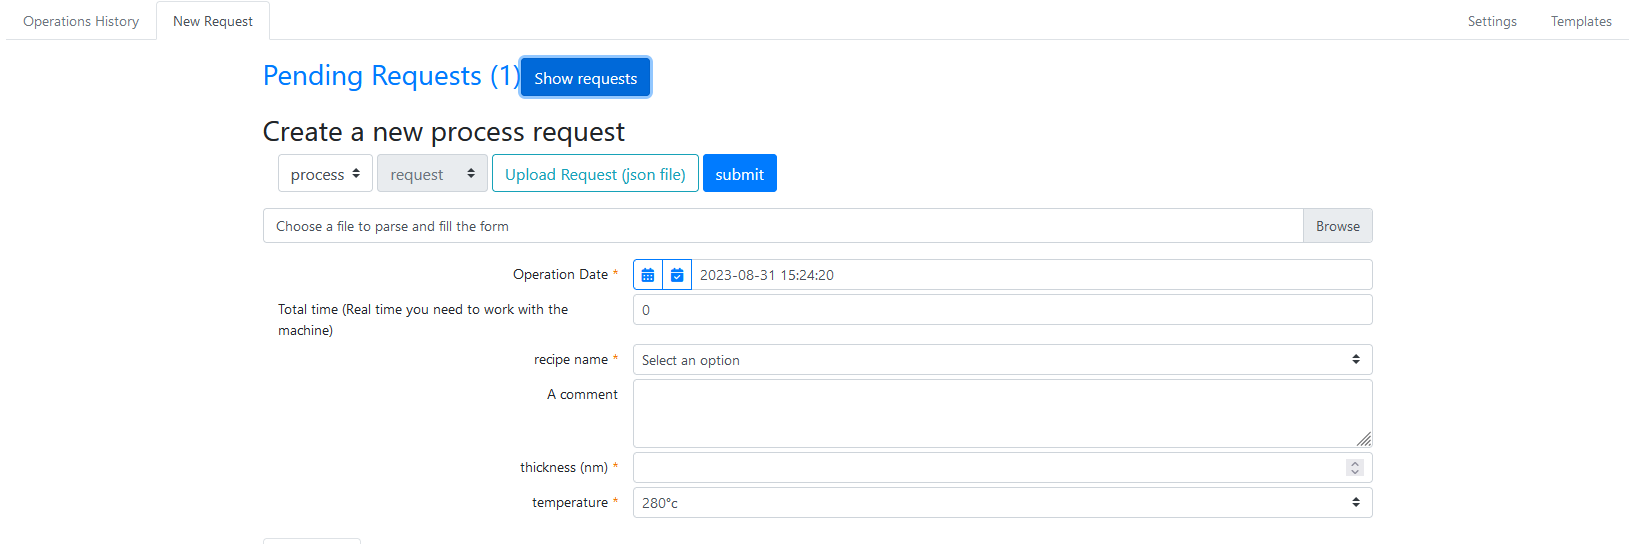
Note that the second button is now request instead of process as before. You can simply indicate the process parameters that you want, and enter the sample(s) to be processed. Once completed, the process step will appear both in the machine history, and in you sample’s history.